From the Garage
How to Stain a Wood American Flag (Step-by-Step)
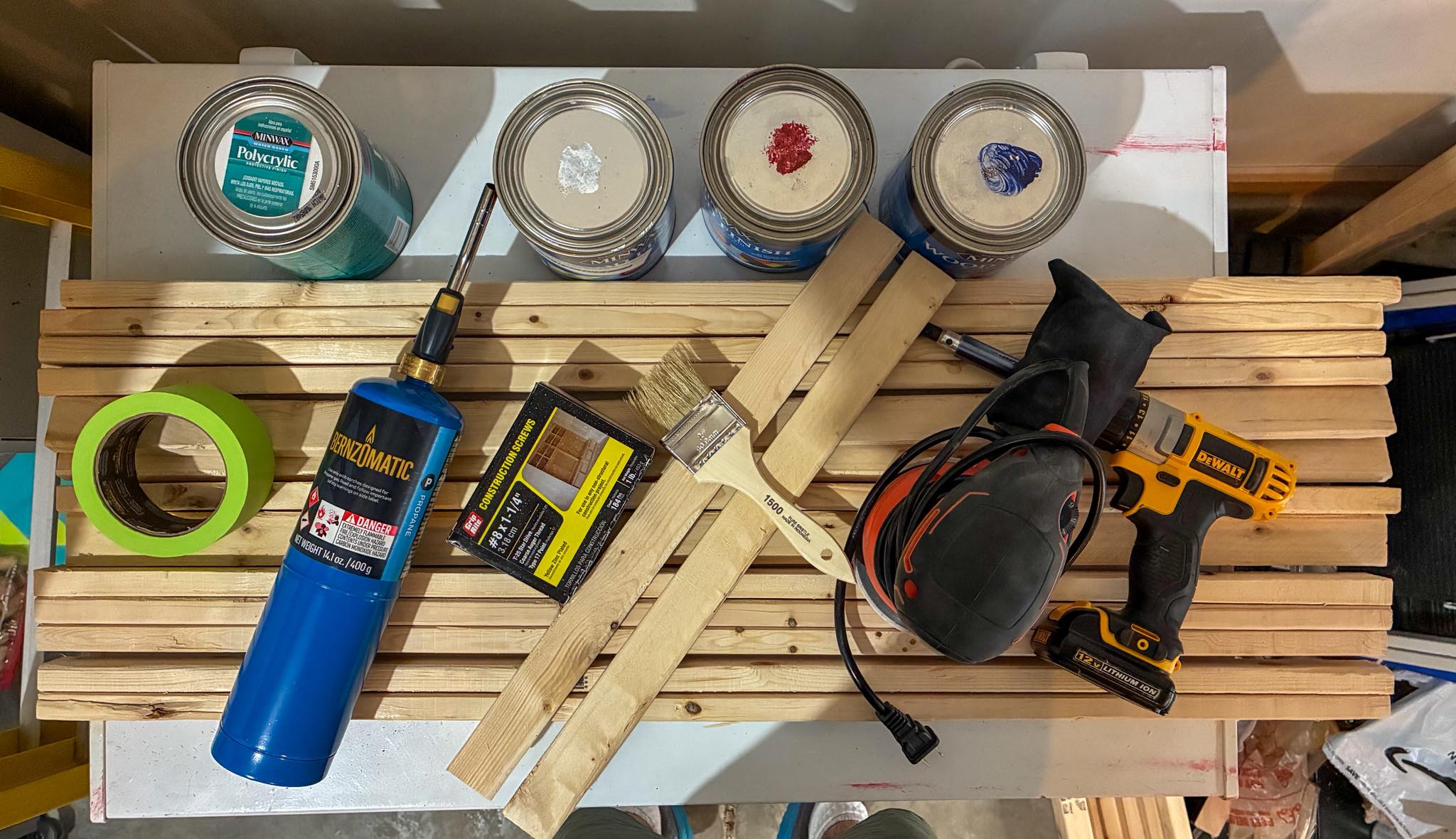
The staining step is where most first-time wood flag builders either nail it or lose it. Get it right and the flag looks like it was made to last — rich color, visible grain, stripes you want to reach out and touch. Get it wrong and you end up with blotchy, muddy boards that don't read as a flag from across the room.
I've built enough of these in my garage in Trussville, Alabama to know where the mistakes happen. Here's the full process — how I do it, in order, so your first stain job comes out right.
If you haven't built the flag structure yet, start with how to build a wood American flag first and come back here when your boards are cut, sanded, and laid out. The free build plan has a supply list, and the stains I have used are named in the DIY Kit guide.
What You'll Need for Staining
- Red wood stain — for 7 stripes
- White wood stain — for 6 stripes (or a very light natural stain)
- Blue wood stain or paint — for the canton (the star field in the upper left)
- White spray paint — for the stars
- Star stencil — sized to fit your canton
- Rags or foam applicators — for wiping the stain
- Painter's tape — to mask the canton before staining stripes
- Polyurethane — for sealing (satin or semi-gloss, 3 coats)
- 220-grit sandpaper — light scuff between seal coats
- Hand torch (optional) — for a rustic, burnt finish before staining
Step 1: Sand Everything Before You Touch the Stain
If your boards aren't smooth, the stain will look rough. Sand all 13 boards on both faces and the edges before you begin. I use 120-grit to knock down any mill marks, then finish with 220. Wipe off the dust with a dry cloth. Don't skip this — it's the foundation for everything that follows.
Step 2: Optional — Torch the Boards First
If you want a rustic, weathered look, pass a hand torch lightly over each board before any stain goes on. The flame scorches the soft grain first, so the wood's natural pattern rises up dark and dramatic. Stain over char gives you deep, smoky reds and a flag that looks like it has history.
Skip the torch if you want a cleaner, more vibrant look. For my own flags, I torch every board — it comes down to where the flag is going and what the wall looks like. See how I finish every flag if you're deciding.
Step 3: Mask and Stain the Blue Canton
The canton — the blue rectangle in the upper-left corner where the stars go — gets stained first. Here's why: if you stain the stripes first and then try to mask off the canton, you risk bleeding blue onto finished red or white boards. Blue first keeps the order clean.
- Lay your boards face-up in order, side by side
- Use painter's tape to mask off the canton area on the top 7 boards — the upper-left section where the stars will go. Use your star stencil as a sizing guide so the blue field will be proportioned correctly when the stars go on later.
- Apply blue stain or paint to the canton. Work it in with a rag, wipe away excess.
- Let it dry completely before removing the tape and moving to the stripes.
The canton covers the left portion of the top 7 stripes. Once it's dry and the tape comes off, you'll see the blue field sitting cleanly against the rest of the boards.
Step 4: Stain the Stripes
This is the main event. The pattern is 13 stripes — 7 red and 6 white — starting and ending with red. The order, top to bottom:
Red · White · Red · White · Red · White · Red · White · Red · White · Red · White · Red
Work one board at a time. Pour or brush a small amount of stain onto the board, then immediately wipe it in with a rag using long strokes in the direction of the grain. Remove the excess as you go — you want color that goes deep into the wood, not a coating sitting on top of it.
For red stripes: apply the red stain to all 7 red boards (keeping the canton section masked or already done). Work one board completely before moving to the next.
For white stripes: "white wood stain" is closer to a very light, natural tone than a pure white — it lets the grain show through while keeping the board clearly lighter than the red stripes. The key is that the stripe reads as distinctly lighter than red from a few feet away.
Let all boards dry fully before assembly.
Step 5: Paint the Stars
Once every board is fully dry, assemble the flag face-up. Position your star stencil over the blue canton — centered, with even margins on all sides. Spray white paint in light, even passes. Don't hold the can close or the paint will bleed under the stencil edges. Multiple light coats are better than one heavy coat.
Lift the stencil slowly and straight up when done. Let the stars dry before handling.
Step 6: Seal the Whole Flag
Sealing protects the stain, locks in the stars, and gives the flag a finished look. I use polyurethane — satin or semi-gloss, your preference.
Apply 3 coats with a foam applicator or brush, letting each coat dry completely. Lightly sand with 220-grit between coats to knock down any dust nibs, then wipe clean before the next coat. After the final coat, let it cure fully (at least 24 hours) before hanging.
Tips for Even Color
- Stain in the same direction. Always wipe with the grain, never across it. Cross-grain strokes leave visible marks that catch the light wrong.
- Work fast, one board at a time. Stain dries quickly. If you apply to multiple boards and then go back to wipe, the first boards will have dried unevenly.
- Test on scrap first. Your specific lumber will absorb stain differently than mine. Cut an extra inch off one board and test your color before committing to the full stripe.
- Keep blue off the red and white. Work the canton completely dry before staining stripes next to it. Blue bleeds into adjacent wet stain fast.
- Let each color fully dry before the next. Rushing the white stripes while the red is still wet will muddy both colors at the seams.
Common Mistakes to Avoid
- Brushing and leaving the stain. Stain is not paint. If you brush it on and don't wipe the excess, you get a blotchy, heavy coat that obscures the grain.
- Skipping the sand. Rough boards absorb stain unevenly. The high spots look light, the low spots look dark. Sand before you start.
- Staining the stripes before the canton. You'll end up taping over wet stain or getting blue on finished boards. Canton always goes first.
- Spraying the stars too heavy. One heavy spray pass under a stencil gives you bleed and fuzzy edges. Two or three light passes give you crisp stars.
- Rushing the dry time. Assembling or sealing before the stain is fully dry traps moisture and softens the finish. Give each coat real drying time.
Frequently Asked Questions
What kind of stain works best for a wood American flag?
Gel stain or standard oil-based wood stain both work well. Gel stain is thicker and easier to control on vertical surfaces; standard stain wipes cleaner and shows more grain. Either way, wipe off the excess — the wiping technique matters more than the stain brand.
Can I use paint instead of stain on the stripes?
You can, but you'll lose the wood grain entirely. Part of what makes a wood flag distinctive is that you can still see the lumber underneath the color. If you want the grain to show, use stain. If you want opaque color, paint works — just thin it and wipe it like a stain rather than brushing it on solid.
How do I get the white stripes actually white?
Pure white stain on bare pine reads as a very light cream or off-white — that's normal and looks good. For more contrast, try a white-pigmented gel stain or a diluted white paint wash. The goal is a stripe that reads clearly lighter than the red from across the room.
How long should I wait between staining and sealing?
At minimum, let the stain dry overnight — 8 to 12 hours for most oil-based stains. If you rush to polyurethane over wet stain, the seal traps solvents and the finish stays soft. When in doubt, wait another day.
Do I need to stain the back of the boards?
No. The back gets covered by the backing boards during assembly and never shows. Focus your staining on the front face and the visible edges.
Get the Full Build Plan Free
The staining steps above are part of the complete process I use on every flag I build. If you want a printable starting point — the cut list, the build steps, a supply list, and the torch safety notes — I put it on two pages and I'll send it to you free. The full guide with a troubleshooting section is in the DIY Kit.
Get the Free Build Plan →Rather Have One Built for You?
Staining is the most satisfying part of the build — but it's also where the most time goes. If you'd rather have a finished flag on your wall without the hours in the garage, I build each one myself, by hand, in Trussville, Alabama, and ship it free to your door.
Building One Yourself?
The $25 DIY Kit includes separate guides for the standard 3-foot and 17-inch flags, matching 50-star SVG files, letter-size printable templates for both sizes, and a two-page 24×36 copy-shop PDF. Choose the page for your flag and print at Actual Size. The guides explain the two different build methods and the standard-kit measurements; custom-size tool layouts are a separate path.
See the DIY Kit — $25 →Building a different size? The Custom-Size Kit ($29) is drawn to your exact dimensions. Just getting started? The free build plan is yours.